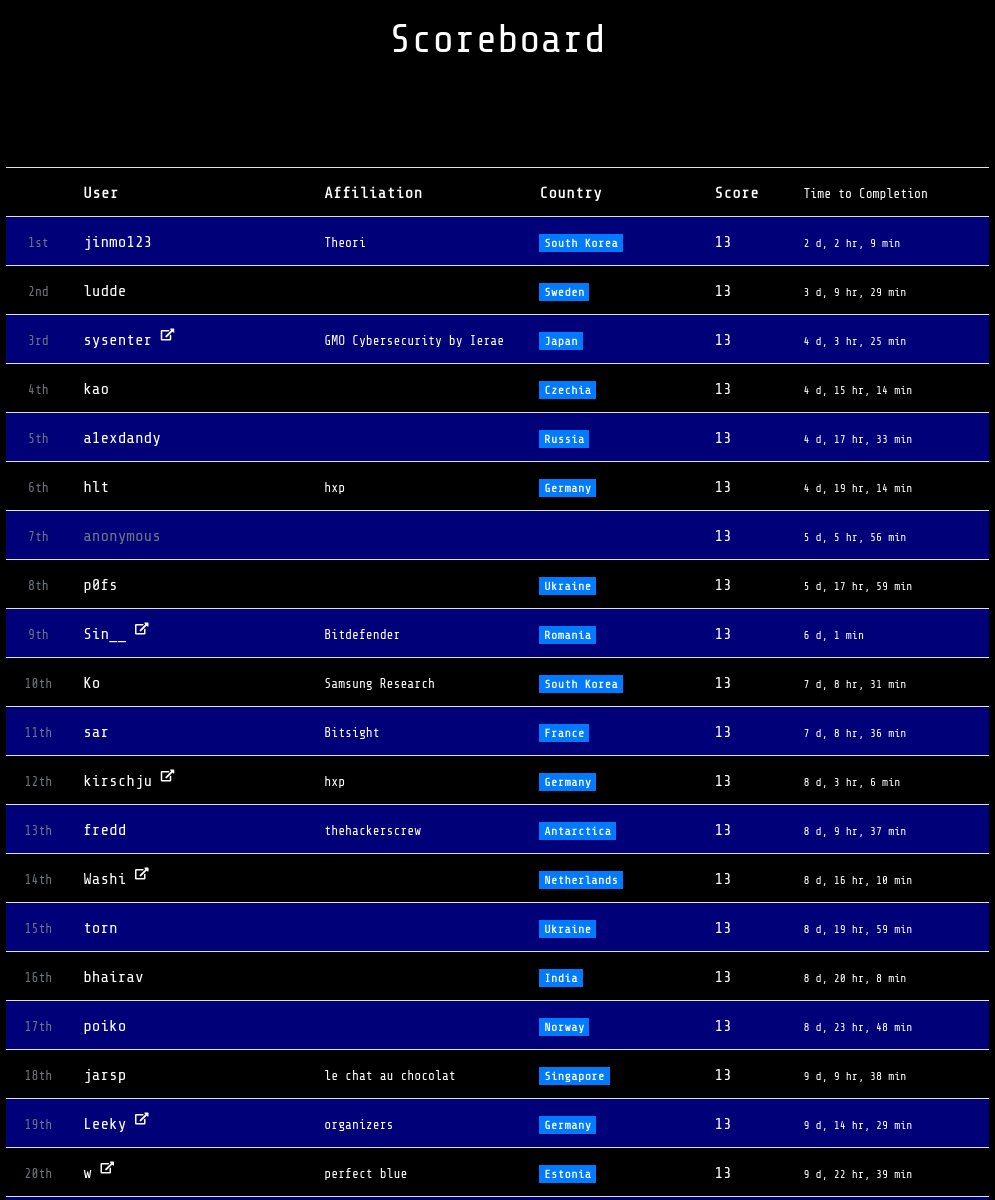
Wow, it's been over a year now! Flare-On 10 (a reverse engineering challenge organized by Mandiant (well, now Google-Mandiant)) just finished a few weeks ago and as promised, it is probably the most challenging Flare-On so far. I finished #18th out of ~4500 globally (with a little bit of good luck!) which made me pretty happy :3
Interestingly, according to the authors quite a number of the challenges were based on real malware samples. As the full solutions have already been shared on their website, this will once again be mostly quick thoughts on the approach I took, which involved a lot of emulation and debugger scripting (very useful!).
Also, I won't be continuing the Papa Rudin series (sorry!). Rest assured that I did finish the book and am still reading math! Currenly I am slowly reading through Lee's Introduction to Smooth Manifolds which has been just such a pleasure to go through.
Anyways, back to the challenges! (All images taken from Mandiant's official solutions.)
Challenge 1: X
Official Writeup: 1-x-flareon10.pdf
Just your usual sanity check challenge. You are presented with a GUI .NET application which lets you enter a two-digit password, I just tried all the possible combinations until it gave me the flag.
Challenge 2: ItsOnFire.apk
Official Writeup: 2-itsonfire-flareon10.pdf
Our first (and only) apk challenge this season. I was too lazy to get an Android emulator up and running so I worked through this statically. We look at the intents specified in the manifest to find interesting entry points, noting also that the application communicates with Firebase.
By understanding how Android stores and retrieves string (and other) resources, we can determine that the application accepts messages from a Firebase server, one of which triggers the decryption of the flag image using AES-CBC. I extracted the flag image and decrypted it myself.
Apparently, this challenge was inspired by an increased use of Firebase as a C2, with the author citing a North Korean Android backdoor application.
Challenge 3: mypassion
Offical Writeup: 3-mypassion-flareon10.pdf
Reverse engineering is mypassion.exe
This challenge killed a lot of participants, a large part of that probably being the number of layers it had. I don't think it was particularly difficult otherwise, though there is one bit in the middle which is a little tricky.
I won't go through the whole binary, but the input to the binary was a string using the forward slash character as delimiters. There were 7-8 layers to the binary (depending on how you count them), with each layer doing some kind of check against a section of the input string.
The most challenging/interesting bit was a bit of shellcode which had bytes missing and which were taken from the input string. When fixed up, the shellcode manually resolves various WinAPI functions, starting by reading information from the TEB (so this requires a little bit of knowledge as to what's in GS:[XX] on Windows - in fact the first instruction involving the segment addressing was one of those missing bytes).
To solve this bit I used Capstone to dump out the possible disassembly sequences for me and I look through them to see which looked right, as well as using some knowledge of the TEB and a guess as to what the shellcode was doing.
Challenge 4: aimbot
Official Writeup: 4-aimbot-flareon10.pdf
o shit gameing time
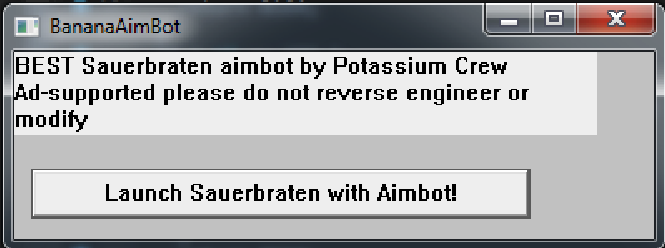
Ok this challenge was pretty easy but quite funny. It is basically (allegedly, not tested) an aimbot for the open source Cube 2: Sauerbraten, and in the background it drops an XMRig coin miner and decrypts and injects aimbot.dll into the running game process.
In the background the aimbot goes ahead to steal personal data from Steam, Discord and Sparrow (a crypto wallet) by chaining together various shellcode blobs (one blob uses info from the stolen data (that happens to be constant across installs) to decrypt the next blob and run it, etc.), then runs a blob which sends the stolen data to https://bighackies.flare-on.com/stolen, and finally runs a last blob which checks various things about the Sauerbraten process and decrypts and writes the flag into memory.
There is some anti-debug going on before going on to steal info, but after letting the aimbot unpack itself I did the rest of this statically so it did not matter (and it was pretty straightforward to do so).
Challenge 5: where_am_i
Official Writeup: 5-where-am-i-flareon10.pdf
This binary injected code into an explorer.exe instance and executed it via an APC (Asynchronous Procedure Call). The initial part is repurposed from an open source dropper, as I found out a little bit into reversing it. There was a bunch of work to do for this because there were two or three chained blobs of shellcode encrypted differently, and there was obfuscation applied to the shellcode to insert jumps between every instruction (which code analysis/decompilation tools really seem to hate for some reason (surely there must be some way to fix this behavior, but I am not sure, let me know!)).
For me, I used WinDbg to let it decrypt and dump the shellcode blobs, and wrote a Python script using the Capstone and Keystone libraries (a disassembler and assembler respectively) to deobfuscate the code. This was conceptually straightforward (disassemble, reconsititute the basic blocks and rewrite branches, emit rewritten assembler instructions and assemble it), which some special attention needed to take care of branches and calls. Fortunately there was not any RIP-relative addressing so I did not have to fix that up as well.
After bugfixing my code for some time and getting it to work right, we see the the final shellcode blob suggests that the flag is RC6 encrypted with a specific key embedded into the blob. Decrypting it gives the flag.
Challenge 6: FLARESays
Official Writeup: 6-flaresays-flareon10.pdf
This was a cute challenge. We are given a PE file which, if you throw into IDA doesn't seem to contain much. It decrypts some unset data in the binary, does some anti-debugger checks and eventually call NtRaiseHardError to dispay a message box (cute trick) with the decrypted data!
It does however have an oversized DOS code section (complete with a fake 'This program cannot be run in DOS mode' to throw you off a little), and we can use e.g. DOSBox to run it to get our Simon Says challenge. Beating 128 levels writes the encrypted flag back into the executable (which is decrypted by the 64-bit component of the executable). To solve this I mainly just reversed it statically, reconstituted the flag generation algorihm and wrote the encrypted flag back into the executable myself.
Challenge 7: flake
Official Writeup: 7-flake-flareon10.pdf
gameing pt 2 (ok part 3, simon says is a game ig)!!! snake game snake game
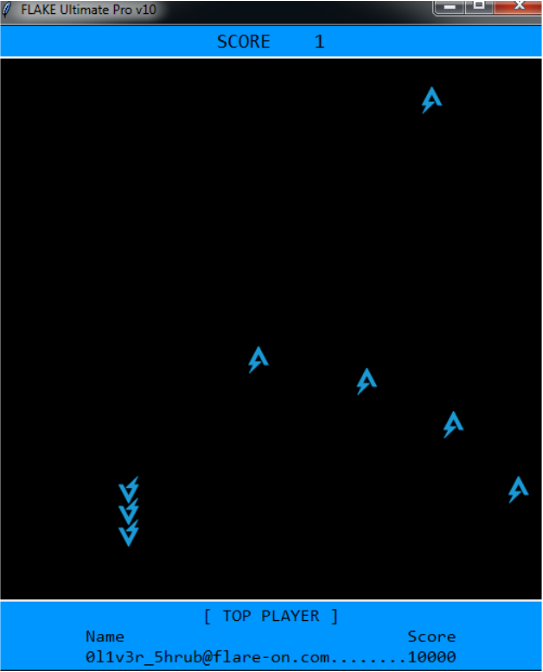
This is a snake game written in Python and compiled to a single executable with Nuitka. Nuitka first transpiles the Python code into C code which calls into the Python C API, before compiling and packaging it, so the resulting code (of the transpiled bits - not everything is necessarily transpiled) is not Python bytecode.
We had to cheat to beat the impossibly high highscore - there are many ways to accomplish this, the way I chose was certainly not the most direct but I did enjoy learning stuff along the way!
I compiled some test Python programs with Nuitka so I could compare with Nuitka sources and the flake binary to find out where the main code of the compiled Python was hidden. (If you have ever seen any compiled/packaged Python binary, there is a metric ton of boilerplate code before anything interesting code actually executes.)
With reference to the Nuitka and CPython sources, I wrote a WinDbg plugin to dump Python objects for me, up to and including dictionaries (mostly for fun tbh). With some static analysis, I found the relevant check functions and edited the relevant Python objects to let me beat the highscore and bypass some checks. Once that is done, the flag appears in a popup.
Challenge 8: AmongRust
Official Writeup: 8-amongrust-flareon10.pdf
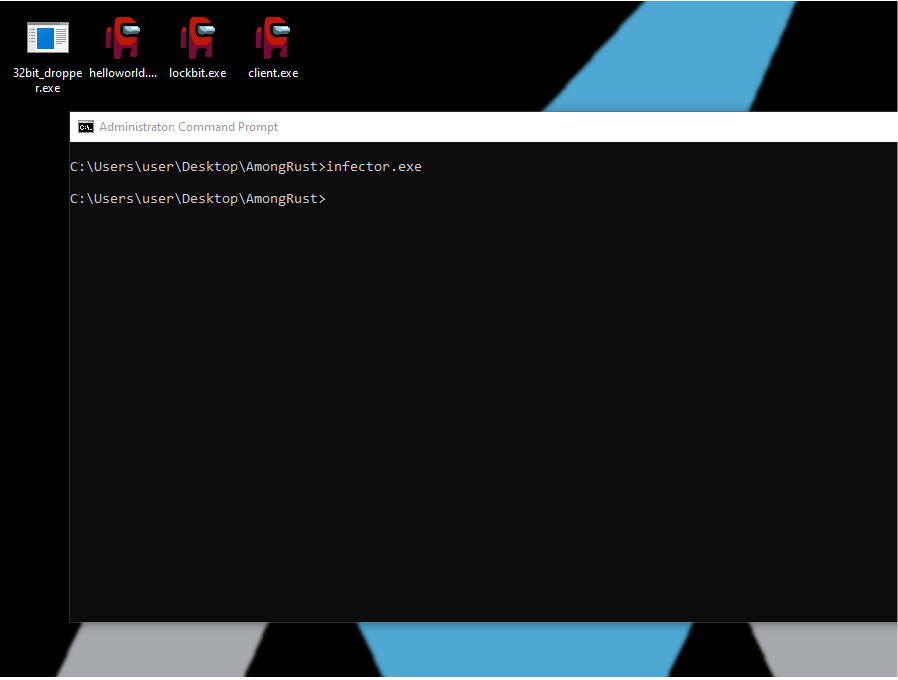
This was fairly straightforward, we are given a compiled infector.exe Rust binary which injects code into a whole bunch of random binaries on the victim computer and changes their icons into amogus:
We are also given a pcap of network communications between a hypothetical victim computer and a bunch of other servers (though most of it is not very relevant).
The main challenge is just parsing the decompiled rust code as there is a bunch of boilerplate, which is not too difficult after a little while. Observing the decompiled code we see that one of the injected binaries is sus and starts a listener. I looked at the code injected into that binary enough as well as the pcap to determine that it is a) otherwise harmless and b) allows an attacker connected to the listener to upload encrypted files. Replaying the relevant parts of the pcap back to the listener spits out a cute wallpaper with the flag:

Challenge 9: mbransom
Official Writeup: 9-mbransom-flareon10.pdf
Ransomware challenge! We are given a disk image that has been encrypted by ransomware which outputs a 6-byte victim ID and asks for an 8-byte key. With a little bit of knowledge about bootloaders and MBRs (namely that on x86 they load and begin execution at 0000:7c00) it becomes relatively straightforward to reverse the 16-bit real-mode ransomware code. (As an aside, I tend to find that 16-bit challenges are usually easier than normal ones (even without access to a 16-bit decompiler, which I didn't have) simply because it is harder to setup the environment and write complex 16-bit code.)
The first 6 bytes of the key turn out to be a simple XOR with the victim ID, and the last two bytes need to be brute-forced. I could not be bothered to determine the encryption routine, so I used Unicorn to emulate the relevant portions of the decryption routine and brute force it that way. After entering the correct key it decrypts the disk and boots into FreeDOS and the flag file can be read.
Challenge 10: kupo
Official Writeup: 10-kupo-flareon10.pdf
This was my favorite challenge by far of the CTF, definitely a highlight. As per the challenge description, this is a Forth interpreter written for the PDP-11, on the BSD-2.11 operating system. I'm not specifically a retro computing nerd myself, and had never worked with any of these before, but it's always interesting to learn new stuff!
Forth is a stack-based programming language that has a fairly simple design - its simplicity led to its widespread adoption and many different implementations. We are provided a PDP-11 disk image for the BSD-2.11 OS and are very kindly given some instructions to guide us most of the way towards booting the image with the SIMH emulator and loading and mounting a (virtual) magnetic tape drive that contains the actual Forth emulator.
After getting it working and playing around with the adb debugger (weird syntax) I used an external program to extract out the interpreter from the tape file and dump it into IDA, which fortunately can, in fact, disassemble PDP-11 instructions. (This would have been a bit more annoying working only with adb.) I also used nm to pull out the symbols from the Forth interpreter (which were also kindly not stripped) and used an IDA script to transplant the symbols.
IDA doesn't really understand the control flow of the code, because instead of straight-line code this Forth interpreter is written largely as so-called threaded code, which essentially stores list of function pointers to call in a row which are then called sequentially (more or less, you can think of it more as a control flow stack). This saves a lot of space and makes the code more compact, and also prevents IDA from figuring out the control flow properly. The upside is that in the disassembly, since we have symbols, for the Forth verbs (commands) that are implemented in the threaded style we can mostly read off the implementation from the offsets being called:
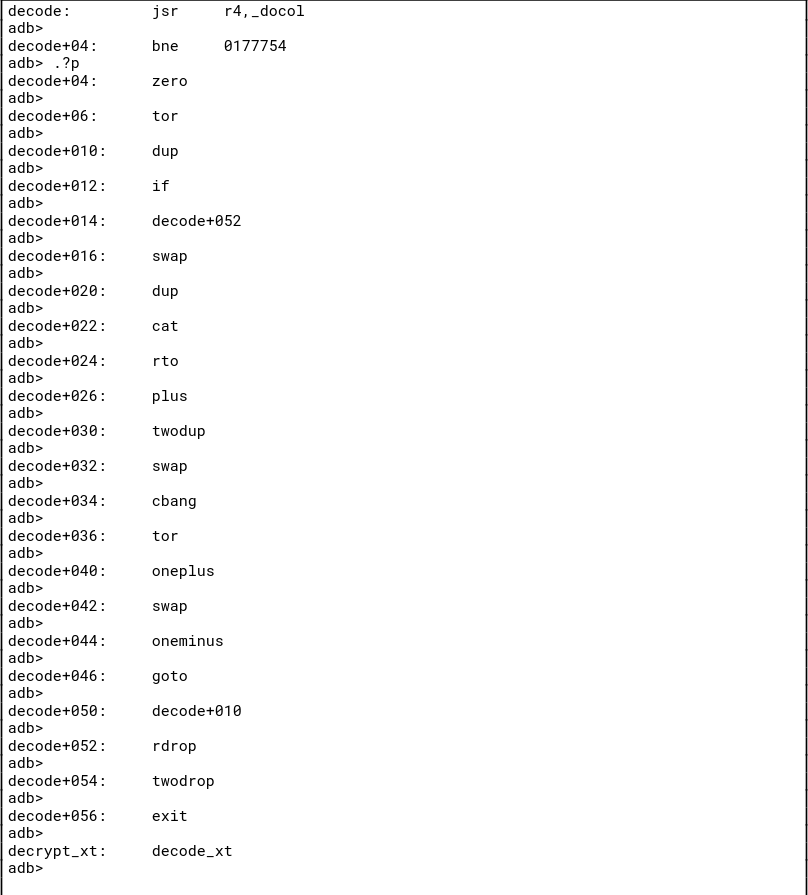
Using this knowledge we can clean up the IDA disassembly and determine what the secret commands (secret, decrypt, decode) do and what arguments they need. You can write a Forth one-liner then to print out the flag but I just reimplemented the routines in Python instead (booo boring).
As it turns out, at this point I had been solving challenges at roughly the same rate other people around my placing were, so my position was barely changing, but there had been a huge pile up at this challenge. I solved it pretty quickly (relative to everyone else) which gave me a huge boost in ranking (from around 46th(?) to something in the low 20s) :3
Challenge 11: over_the_rainbow
Official Writeup: 11-over-the-rainbow-flareon10.pdf
Another file encryptor challenge! I don't have too much to say about this, except that this one uses a combination of RSA and allegedly the ChaCha cipher (though I wasn't really convinced that they hadn't sneakily modified the implementations somehow) to encrypt the flag file. To break it I used Coppersmith's attack to break the RSA part, which contained information about ChaCha's initial state, from which we can reverse the allegedly-ChaCha encryption of the flag.
My only interesting contribution here was that I didn't entirely trust their implementation of ChaCha, so I used Unicorn to emulate it. Since ChaCha is a stream cipher I didn't have to implement a reversed implementation of ChaCha or anything.
Challenge 12: HVM
Official Writeup: 12-hvm-flareon10.pdf
This was annoying because I was on a roll and literally just had to get Covid for no good reason. I woke up, looked at this challenge for a little while and knew what I wanted to do but my headache was bad so I went back to sleep again :(
Anyways, this binary uses the Windows Hypervisor Platform API to run code inside of a hypervisor. The binary blob that is run starts in 16-bit real mode and transitions to 64-bit long mode, though at the time I had a bit of an issue with figuring that out (because I interpreted the output of the disassembler wrongly). Regardless, the hypervisor also traps the in and out instructions, such that when those instructions are executed it encrypts/decrypts portions of the binary blob that is running under the hypervisor, so that the running code is never entirely decrypted in memory at any one time.
I wrote a simple WinDbg script to just break when the hypervisor was handling the in/out instructions and store the decrypted blobs of code, then finally dump all the decrypted segments into a file which I could then dump into IDA. We can then reverse what the blob doing and get out the flag. (I did some emulation of crypto again here, if I recall correctly.)
Challenge 13: y0da
Official Writeup: 13-y0da-flareon10.pdf
Finally the last challenge! I was still down with Covid but I decided to finish this anyway. We are given a binary that happens to be obfuscated with the same unconditional jump obfuscation as Challenge 5! (Apparently, this was based on real-world malware as well.)
I was quite happy about this since I had already spent a bunch of extra time writing out a deobfuscation script for Challenge 5, so I just took that, modified it a bit and fixed some bugs, and it spat out code that I could more or less patch back into the original binary and it would work! The official solution uses an IDAPython script that is pretty neat and some interesting tricks for me to learn from too.
The binary starts a shell and two threads, one to listen for commands and one to send the output back to the connecting user. There is a secret gimmie_s3cr3t command, which asks for a password (patience_y0u_must_h4v3, it checks the MD5 of each of the words in the password, and all those hashes are easily crackable). A string is returned which looks base64 encoded (I was wrong, it is a custom base32 encoding), which changes each time you do this.
After poking around at the other parts of the binary, I determined if the flag had to be anywhere, it had to be in a suspicious-looking function just before what I had assumed was the base64 (actually base32) encoding function. It took some inputs from a Mersenne twister, built a ropchain that called gadgets from a resource in the PE file that was loaded and previously decrypted (after entering the correct password), and output some bytes that went into the base32 encoding function. I used Capstone and Keystone again to flatten out the ropchain and clean up the shellcode, and reconstitute the function.
Once that was done, it was pretty clear that the resulting bytes were being generated one by one using an encrypted string and the Mersenne twister bytes. The decrypted string was never fully in memory at any point, but each character was saved on the stack at a specific position after each output character is generated. For maximum hype I set a debugger breakpoint so I could read out each character of the flag one by one: P0w3rfu1_y0u_h4v3_b3c0m3_my_y0ung_flareaw4n@flare-on.com
Thanks to being able to mostly reuse my deobfuscation script, I feel like I got a pretty quick solve on this challenge and got a bump in my placing from 24th(?) to 18th place, coming in the top 20 :3
Afterword
And finally, we are done, hope you enjoyed reading! This year's challenges were fun and also tricky, and I especially liked the PDP challenge, it was very creative. Thanks to the Flare-On team for putting up a great competition this year. Hope I won't fall sick next time!
